You can import your products directly into Tradevine via the Import/Update Products screen available from the Products menu. We currently accommodate csv (comma separated data) and tab delimited files. These are usually files which have either a csv or txt file extension. This section covers:
If you have photos to assign to your products from your computer, then you should upload these first via the Photos screen before importing your products.
You can create new products, as well as update existing products. If you are integrated with a selling channel like Trade Me, Shopify or an accounting provider like Xero, then we recommend you integrate first, before doing an import. Otherwise, you may need to rerun your import later to upload the data, which is specific to these integrations. You can either import from a file or if you are integrated with Trade Me, then you can import directly from Trade Me. You can also re-import as much as you like. This can be an efficient way to make simple or widespread changes to products. It can be faster than individually configuring each product. Once your products are set up in Tradevine, you can also export the data and re-import the exported data at any time. If you are importing BoM components (Bill of Materials) or suppliers to attach to your products, then we recommend you re-import these files separately, with their dedicated import fields, after you have already imported your products.
You can quickly create an import file for your existing products by exporting your current products from the appropriate Products List view and then modifying the data in the exported file for re-importing.
The Product Suppliers file can be exported from the Products List, but more specifically the Product Suppliers view. The BoM file can be exported from the Product Information view of the Products List. The following can be imported separately, providing your products exist already:
- Trade Me products
- Shopify products
- Suppliers attached to products
- BoM products
Importing from your own file
We recommend you check out how we expect some of the import data to be formatted, before attempting your first import, unless you are importing from a file that you exported out of Tradevine. If your first attempt threw up some error messages in the import error file, then again please check out how some of the data should be formatted.
You can download a blank import template file to use to import your products. Once you have downloaded this file, feel free to rename it with any name, but you must save it as a csv type file, not an xls or xlsx type file.
You can also download an example file with example data. Do not use this file to import with.
If you are importing your Trade Me products from file, then you may wish to also review the heads up info first. Alternatively, if you are importing your products into Shopify, then you may wish to check out the Shopify specific stuff. You can have the same product listed multiple times. This would usually be done when you have either multiple listing rules or multiple Trade Me accounts. If you do inadvertently have duplicate entries, we will continue to overwrite the product with each record we encounter, meaning the details of the last duplicate will be used. You can re-import as many times as you like. The import consists of 5 steps. Step 1 is for selecting the file. Step 2 is about mapping your file fields to our fields. Step 3 is a last chance check for confirming the mappings. Step 4 is the progress and status of the actual import. Step 5 shows the results of the import.
Preparing your import file
If you have multiple but similar items to apply to some products, like multiple suppliers and their details, then you can simply repeat the product line within your import file and just tinker with the fields which differ. When we expect the data to be unique, we will always overwrite duplicate rows using the data from the last row for that product. So if you accidentally repeated a product, we will use the data from the last record we trip over for that product. When we don’t expect the data to be unique and are aware that multiple sub records are possible, we will add the additional sub records to the product. Some of the things that may have more than one record are:
- Product suppliers
- Multiple listing rules for a product
- Multiple Trade Me accounts
It is Ok to leave the non-mandatory fields blank, we will just use the default values to fill in the gaps, when we need to. If you intend to upload your photo’s from either your computer or a website, then you can speed up your photo uploading by ensuring you complete the Photo Identifier field in your import file. See Upload Photos for more info. If you want to re-price or reformat some of your file data, then you might want to check out our handy Excel formulas and tips page. You can import special symbols like the copyright and trademark symbols etc. If you intend to use these symbols then you will need to save your import files in UTF-8 format.
Step 1
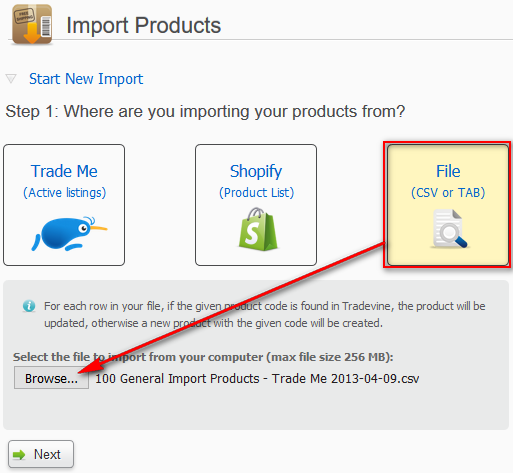
Select the file to upload by first clicking on the File type icon. Then browse to find the file.
Select the Next button to progress to the next step.
Step 2
This is where you get to map the fields from your file to our fields. We will first try to automatically match as many unique fields as we can, to try to save you some time. Make sure you check these mappings very carefully. When selecting the field to map from, any field which has already been mapped, will be greyed out. You can still use the greyed out fields for other fields and as many times as you like. You need to tell us, if your file has headers. Make sure you give the First row contains headers checkbox a little attention too. 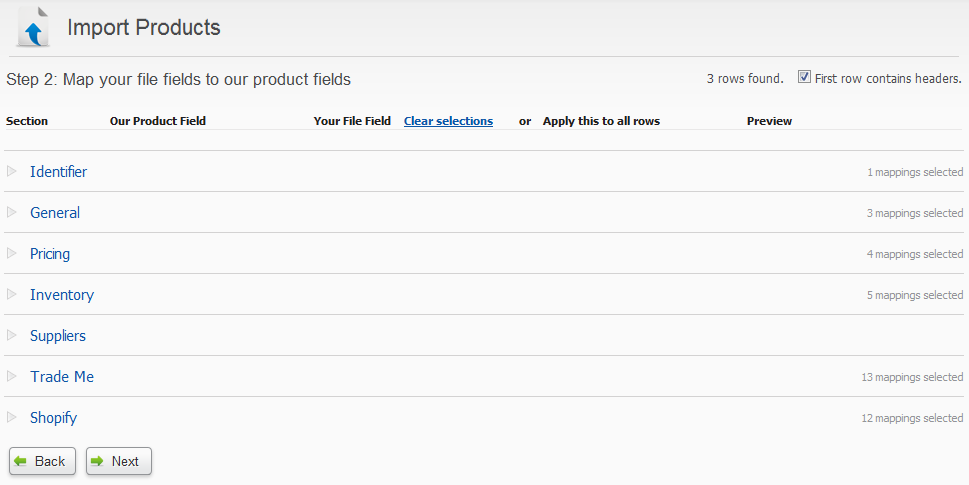 Here’s a glimpse of the expanded view of the first two sections:
 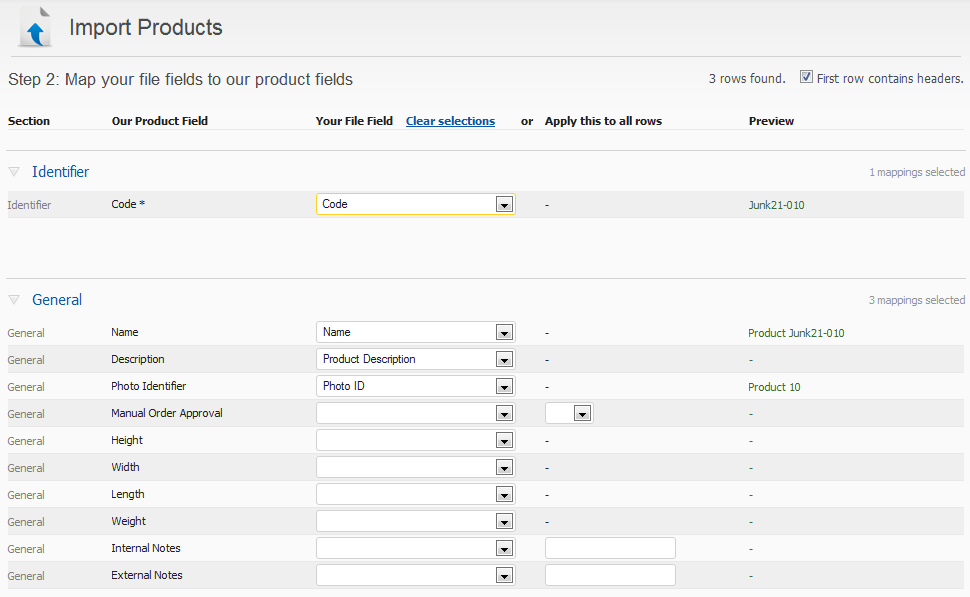 We allow you to apply a consistent value to some of the fields. Use the droplists and text fields under the Apply this to all rows column to overwrite any file data and set all the values for that field to a specific value. We look for an explicit match (not case sensitive) on the Tax Code and try to detect the following values: GST, VAT, None, Zero and Exempt. We also provide a small preview of the first row of data, as a visual clue to help ensure the correct fields have been hooked in.
Step 3
This is where you get a last chance to check the mappings. Please make sure you do, otherwise, this is likely to be garbage in garbage out.
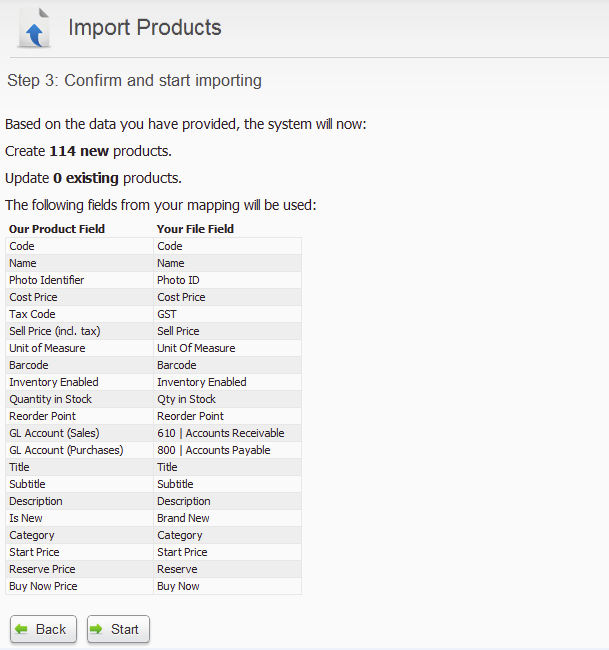
You can go back to correct your mappings at any time by selecting the Back button. Otherwise, select the Next button to go to the next step.
Step 4
Shows you the progress of the import. 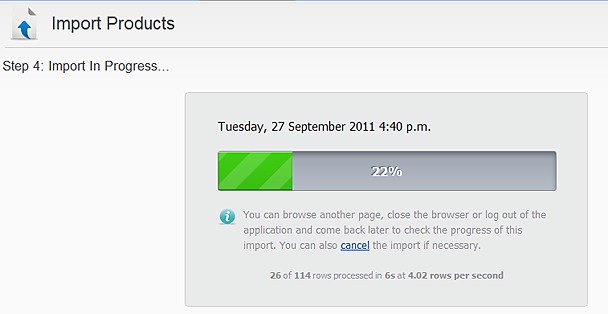 You can cancel at any time by selecting the Cancel link below the graphic. Cancelling does not do a roll back. It simply stops any further records from being created.
Step 5
Shows the final results of the import.
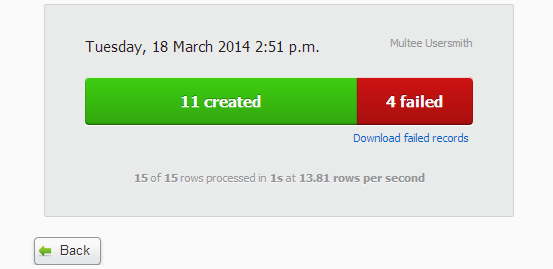
Any failures can be viewed by selecting the Download failed records link. The download is a csv file. All errors are reported in the first column called Error Messages. The Error Messages cell may detail more than one error. Once you have remedied any errors, you can re-attempt the import. You may still encounter some new errors which need rectifying. Again after fixing these, you can re-attempt the import. Once you have completed an import, the Most Recent Import link is available at any time when re-opening the Import Products screen. This lets you review the status of the last import, as well as download a failed import file if the import failed for any of your products.
Trade Me specific stuff
Trade Me category references must use Trade Me’s reference numbers, not the text name for the category. Eg. 1234 (that one wasn’t real, we just wanted to show you an example). We recommend the last 4 or 5 digit only format over the full hyphened code format. This format has more future proofing. You can download our list of Trade Me categories, to help you track down the category codes. To list the same product in multiple categories, in your import file, create a row for each product and repeat the product data for that product. Then just ensure you give each Rule Name (listing rule) a unique name. We will just keep updating the product with the same data, but create extra listing rules for the product. If you upload your photo’s after first importing, we will automatically associate your photo’s with the listing. Otherwise, photo’s have to be manually attached to the listings by opening up each product individually.
Import directly from Trade Me
You can create products in Tradevine, directly from your active listings in Trade Me, by selecting the Trade Me (Active listings) button. This will also upload the photos and display the listings on the Listings screen. Existing products will only be updated, if they match on all the following set of fields: Title, Subtitle, Description, Category, Start price, Reserve price and Buy Now price. If any of these differ, then a new product will be created. Listings that are not active or have been deleted, but have open FPOs will also be imported.
If you are importing your My Products from Trade Me, then the SKU code will be imported as the product code. The inventory stock levels will also be imported. Any products with infinite stock will be set with inventory tracking off.
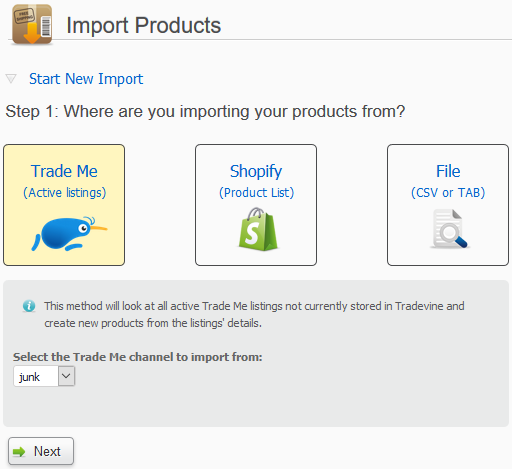
Selecting the Next button will take you directly to steps 4 and 5, which are outlined above. Your product inventory may temporarily go into the negative for a few days until the current listings on Trade Me close or any fixed price offers expire. You will have to set the cost price for each product, since Trade Me does not know the cost price. If you have a lot of products, then the best way to update the cost prices, may be to export the products out to a file; update the file with the new cost prices and then re-import. If you already have My Products set up on the Trade Me side, then you would be advised to turn off auto-listing at the global level in Tradevine until you are ready to properly use Tradevine. Remember to deactivate My Products in Trade Me when you are ready to use Tradevine for real. Now that you have imported your active listings as products into Tradevine, there are a few things you should configure on each product before continuing to list your product’s again on Trade Me. An alternative to creating products from your active Trade Me listings is to import from file and to reference the listing using the Populate From Listing ID field. This also allows you to configure a cost price and each product’s inventory levels, as well as create product codes of your choice.
Shopify specific stuff
The first time you import each product to upload to Shopify, the product photo is likely to be missing. This is because photos are assigned to products in the next step after importing, so once you have assigned your photos, you may need to go to the Settings > Shopify Settings screen to mass update all your Shopify products. If you want to display some of your products on specific web pages in Shopify, without having to manually add each product to the web page each time, then you can do this by setting up Smart Collections in Shopify, which target specific product information. These can be configured to target product Types, Tags, Pricing, Vendors, Titles, Weights and even Inventory. Setting the Is Listed on Shopify field to No/False will remove the product from Shopify when re-importing.
If you have products set up in Shopify as multi-variants, then each of the variant properties will be appended to the product name. For example, if you have a product titled Ballroom Dress with size and colour variants of 12 and Red, then the product will be imported with the name Ballroom Dress – 12 – Red
Import directly from Shopify
You can create products in Tradevine, directly from your products in your Shopify webstores, by selecting the Shopify (Products List) button. This will also upload the photos for your products.
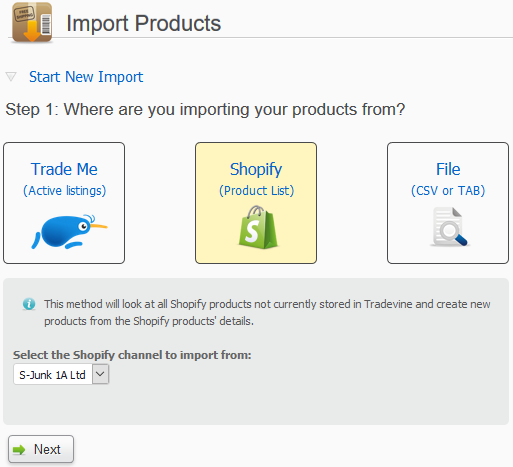 If you have more than one Shopify webstore then remember to select the Shopify account to import the products into. Note, not only will the product be created, but even though you only nominated one Shopify account, the other Shopify accounts on the product will also be configured with the product. If your webstores have different products, then you may want to edit the product and ensure the List this product checkbox is off for the other Shopify accounts, so that the products don’t get uploaded to your other webstores.
