The Shipments List found under the Sales menu, displays all your sales shipments. A warehouse only user will only see the shipments for the warehouses you have set up for them. When a warehouse only user logs in they will only have access to the Shipments screen and the Fast Shipping screen.
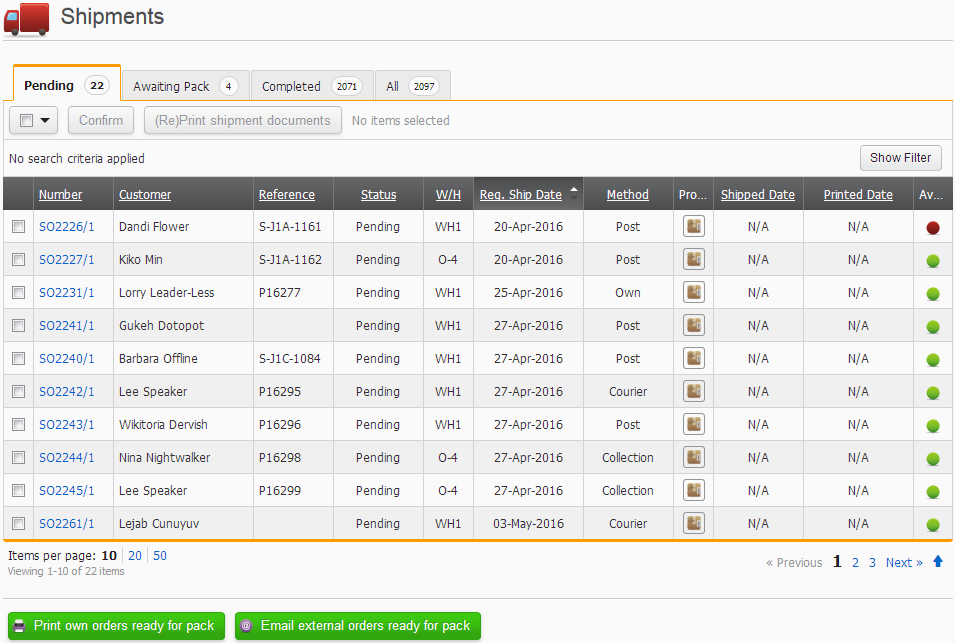 You can sort the list by selecting an underlined column header. An arrowhead depicting an ascending or descending sort will be displayed above the sorted column.
Select the Product Details button to quickly preview the products on the shipment. This will display a thumbnail photo and the product’s name for each product on the shipment.
The Shipment Date will always display as N/A when viewing the shipments on the Pending and Awaiting Pack tabs. Partial shipments will not display a Shipped Date until the last item on the sales order is shipped. Printed Date will always display as N/A on the Pending tab, otherwise this will always be the last date any documentation was printed.
The W/H column shows you the code of the warehouse that the shipments will be dispatched from.
Navigating your Shipments
You can choose to view either 10, 20 or 50 items each time, by selecting the Items per page link at the bottom of the list.
![]()
You can also view the next set of Shipments or a nominated page by using the other set of links at the bottom of the list. Including, specifying the exact page set to view by typing a number into the blank text field (only available when 5 or more page sets exist).
An up arrow at the bottom also allows you to quickly to go to the top of the screen.
Shipment tabs
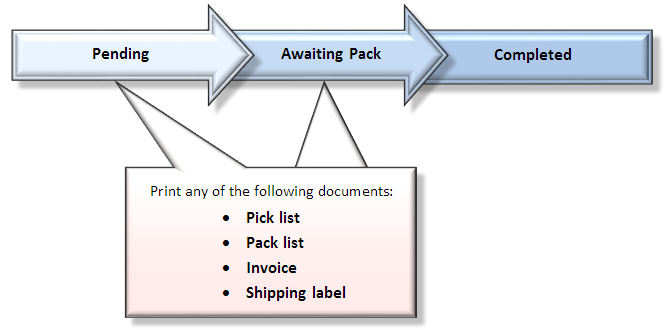
The Shipments screen has a tab for each order status, as well as an All tab. When you select each tab, you will only see the shipments that correspond with that order status. The tabs also display the number of shipments that are in each status. Be aware that these counts will only update when you refresh the screen or return to the screen. Alternatively, each tab will update independently when you select it.
Auto printing
Selecting the Print own orders ready for pack button will display the Print Shipments panel. This allows you to select the documents and labels to print. All the print selections are optional.
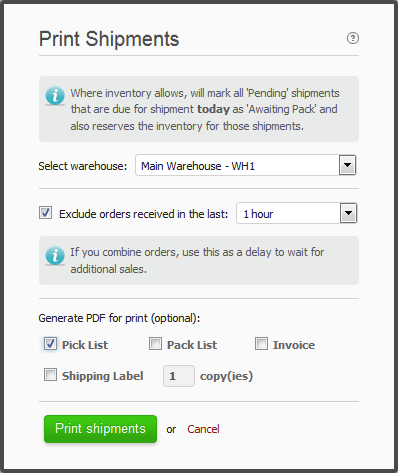
If you have multiple warehouses then you can select any Own type warehouse to run the auto print for.
Selecting the Print Shipments button will progress all the Pending shipments, that have stock available, to Awaiting Pack.
Shipments will be printed based on the traffic light status of the shipments and the oldest Requested Shipping Date. The printed shipments are also grouped by customer name.
For more information on auto printing, check this out.
Bulk confirm shipments
You can bulk confirm multiple shipments from either the Pending or the Awaiting Pack tab.
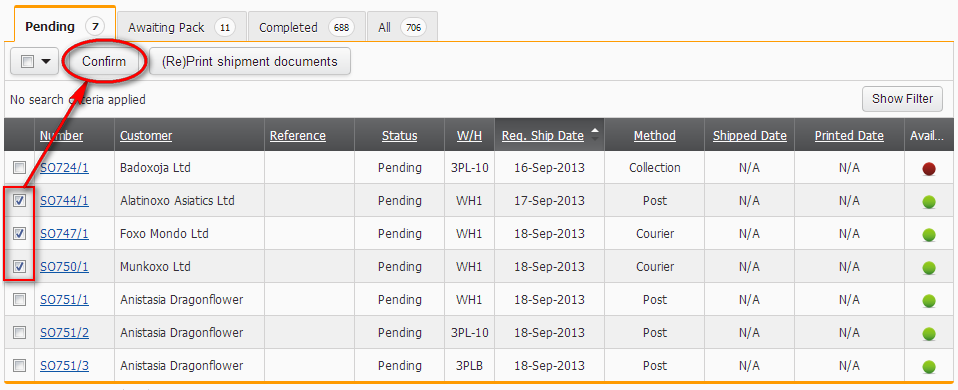
To bulk confirm multiple shipments at once, select the shipments you want to confirm and then select the Confirm button. This should display the Bulk Confirm Pack List dialogue. You can then opt to email either or both the packing slip or the invoice for each shipment.
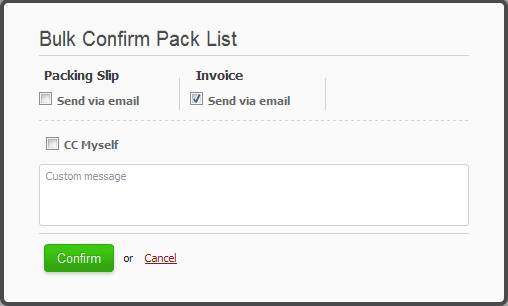
When bulk confirming, you will not be able to enter any courier tracking references or notes etc.
Tradevine has a standard set of email templates, but you can create your own customised email templates.
You can quickly select either all the shipments or all the shipments on the current view by using the bulk selector located just above the list of shipments.

Print multiple shipments
You can print or reprint multiple shipments of your choice using the Selector drop-down just above the Shipments List. This may take a wee while to process depending on the number of shipments to print.
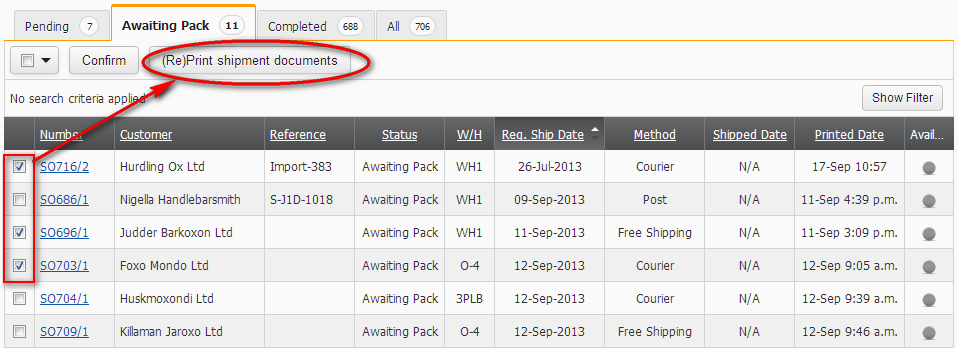
Either select the shipments to print by selecting the checkboxes in the List or in bulk using the Selector drop-down. You can then select the (Re)Print shipment documents button. This will display the Bulk Print Shipments pane.
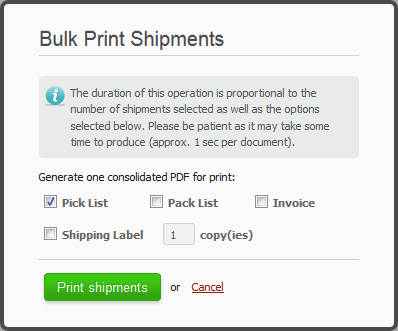
Here you can select the PDF documents and shipping label combinations that you want.
You will need a DYMO printer installed to print a shipping label.
Assigning shipments to multiple warehouses
If you have multiple warehouses then your shipments are likely to have already been assigned to various warehouses. The assignment of each shipment, would have been prioritised according to the following rules:
- Can the product line be fulfilled in full by the default primary warehouse?
- Can the product line be fulfilled in full by either an Own or a 3PL type warehouse?
- Can the product line be fulfilled by splitting it between an Own or a 3PL type warehouse?
- Assign the partial or unfulfilled product line to the default primary warehouse.
The SHIP product is assessed last and assigned to the default primary warehouse if a shipment was created for that warehouse. Otherwise, it will be assigned to the first shipment that was not for the default primary warehouse.
Only warehouses that are enabled and the Available to ship from status is also enabled, will be considered for assigning to a warehouse.
You can manually change the assigned warehouse at any time by editing the shipment yourself.
To auto print the shipments for your warehouse or any of your other Own type warehouses, you should use the Print own orders ready for pack button. To auto print or notify your 3PL and Supplier type warehouses you should use the Email external orders ready for pack button.
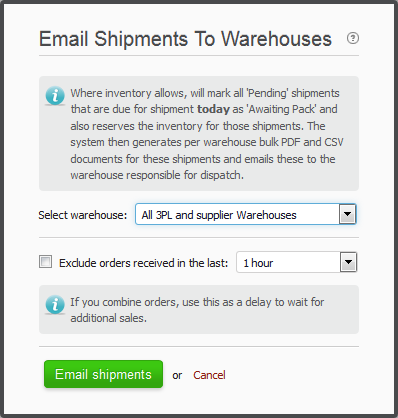
You can use the Warehouse(s) dropdown to notify all 3PL or Supplier warehouses or select a specific warehouse to notify. All the shipments that were emailed will now be progressed from a Pending status to an Awaiting Pack status.
Notify another warehouse to ship the stock
If you have multiple warehouses and some of those are either 3PL or Supplier type warehouses and they have been assigned a shipment, then you can notify any of those warehouses to ship the stock by selecting the Email external orders ready for pack button. This will send an email with a PDF attachment outlining the stock to be dispatched, as well as include a link to a login screen where the warehouse dispatcher can confirm the shipment using the Fast Shipping screen.

You can use the Warehouse(s) dropdown to notify all 3PL or Supplier warehouses or select a specific warehouse to notify. All the shipments that were emailed wil now be progressed from a Pending status to an Awaiting Pack status.
Searching your shipments
Selecting the Show Search Options link located above the list will display a set of useful search options. Remember to apply the search once you have entered all your search criteria. Watch out for the tab you have selected when you view your search, because each tab reports on different shipment statuses.
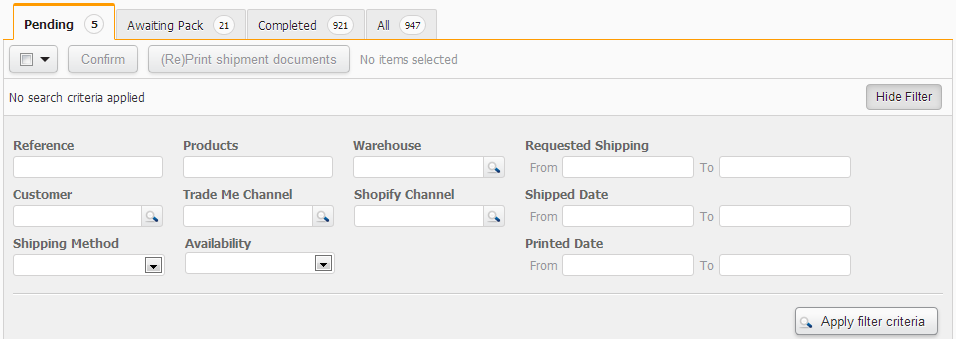
Be aware that any applied searches will persist during the logged in session until you remove the search filter.
You can also use the search to find words or codes that you can only partially remember, by using wildcard search characters to search on some of the fields. These include the underscore symbol and the percentage symbol. Use the underscore to search any single character matches. Use the percentage to search on any combination of characters.
Eg, If you wanted to search on a word/code like Sandbox, then here are some of the plethora of examples which will work: sand%, s%x, %sandbox%. If you know most of the word/code you are looking for, except for a single character, then try some of these examples: s_ndbox, sand_ox, s___bo_, _and__x.
