You can add up to 40 photos to each product. If your photos are located on the web, then you should import your products and use the Photo Identifier fields to assign your photos.
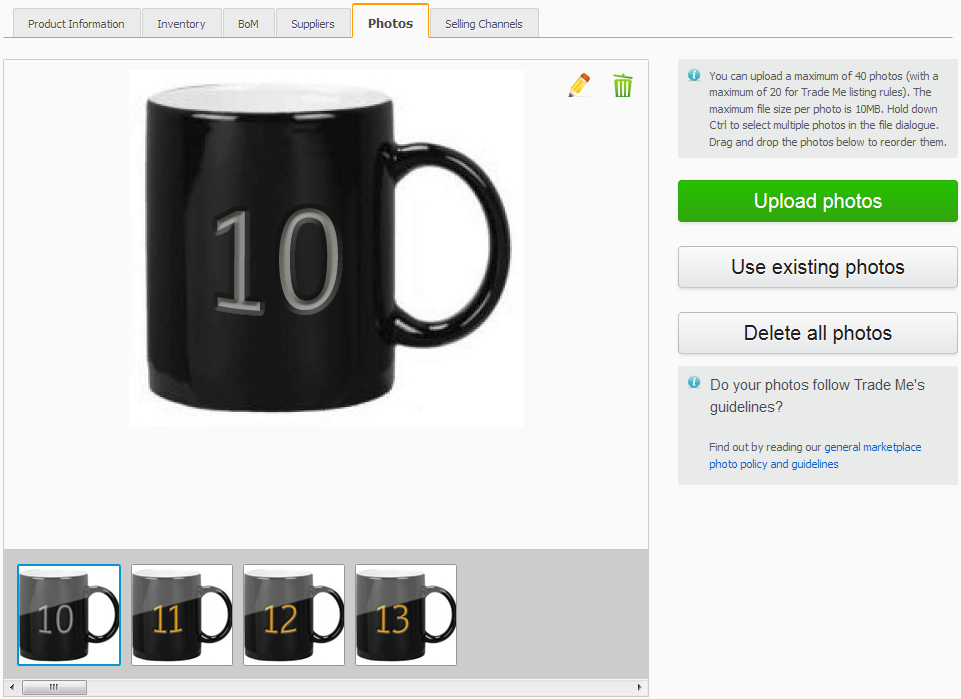
Use the Add Photos button to upload your images. The maximum size for each image is 10.24MB (10,485 bytes).
You can upload JPG, JPEG, GIF, BMP and PNG type images. Any transparent areas in your GIF or PNG images will be retained. Images with a height or width that exceeds 2048 pixels will be resized with a maximum side of 2048 pixels. We recommend PNG images if you have any transparent components in your images. Shopify will retain the transparent components, however, Trade Me will convert the image to a JPG and default the transparent components to a colour.

You can change the order of the images by dragging and dropping the thumbnails. The leftmost image will be the main image used to represent the product.
Selecting the pencil icon will allow you to edit and enhance the photo.
To delete a single image, select the trash can for the image you are currently viewing. To delete all the images for the product, select the Delete All Photos button.
If you are uploading multiple images, when the dialogue to select the photos is displayed, hold down the CTRL keyboard button and select a batch of multiple images to upload or use SHIFT to select a series of images.
You can upload new images using the Upload photos button or you can add existing images by using the Use existing photos button.
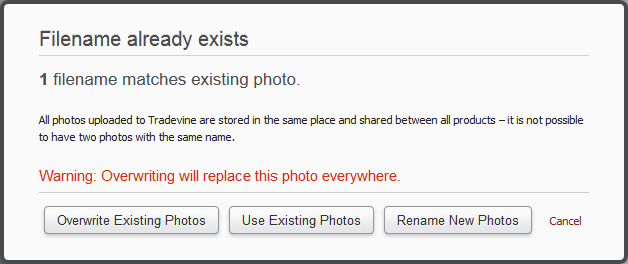
If you have previously uploaded images with the same filenames, then you will be prompted to:
- Overwrite and update the existing photo.
- Use the existing photo, so essentially skip and just use the existing photo.
- Rename the new photo and keep the existing photo, so that you have two copies.

The decision will be applied to all images during this upload.
If you have images that are shared across multiple products, then these will also be updated if you opted to overwrite.
Any errors will be reported with a red error thumbnail. Clicking on the Error thumbnail will reveal more details.

You can remove the Error by selecting it and then viewing the details of the error.